Wednesday, February 27, 2013

Cat PIllow Tutorial

I had this black furry fabric that I wanted to turn into a cat pillow.  I had some ideas about the design, first thinking that I would do a square pillow with a cat face.  I kept looking at the fabric and decided a better way would be a cat shape with no face.  I thought it would make a stately pillow that would be comfortable to sit with. 

Finished cat pillow


I started by laying the fabric out fur side down.  I wanted the pillow to be a large pillow for the couch, so I started with a large round shape.  I found my laundry basket to be the perfect size!  I put the laundry basket on the fabric and outlined it with white chalk.

Now that I had the body traced out, I found another circle that I thought looked right for the head.  Lay it down and trace around that as well.

Next I free handed some ears.  Let me mention that these are not perfect and that is okay!

Draw a tail shape.  As you can see, my first shape was NOT what I had in mind!
Cut out your cat shape, lay wrong sides together and use as a template for the bottom.  Pin and cut out.

Pin cat pieces together

Sew around cat pieces, leaving an opening at the bottom to stuff.  Trim around sewn edges since it is such a thick fabric.

Turn right side out

Stuff the pillow and stitch the bottom closed.  I also stitched the tail to the body because I did not like it flopping around the pillow.

Your finished cat pillow!  As you can see, it is fairly large and it is also very comfortable!

Friday, February 22, 2013

The "Anywhere Chair" (for babies)

While browsing Pinterest, I saw a cute pattern for something called the "Anywhere Chair" by Marzipan.  I got out my material and cut out the pieces as specified on the post.  That was where I got lost (I have been sick this week, so that could have been it).  I was confused by the instructions and was unsure of where to put things.  I am a very visual person, so I decided to write out the steps that I did. 
My version of the Anywhere chair.  It Velcros in the back and the front to secure baby.

Cut out your materials.  Use a circular object to trace and cut curves for the edges. (the two larger fabric pieces, not the small one.)

I laid the small piece along the edges to mark where I should sew to.  I chose that to be the opening that I will turn right side out with.

Turn right side out

I ironed the fabric flat, which makes a difference when you compare the before and after, a very slight difference.  When you top stitch around, ironing makes the job easier and look sharper.
Here is a diagram showing where I put the velcro.

Sew velcro on the smaller piece

Sew velcro on the larger piece.

The final project.  I was putting this on to see how it goes together.  If I was to put a baby in it, I would have it go around the middle slats in the chair. 

The bottom piece folds over and velcros baby in making it safe.

Large velcro strap for the strap that goes around the chair.

Thursday, February 21, 2013

Angry Bird and Pig Double Sided Hat


The red bird side (made before I drew out the pattern)
Pig side

I used this hat pattern: Simplicity 1953, hat C.  I used the main hat piece and added my own embellishments on it to create the faces.    

Click on the images to print the pattern pieces (my first shared pattern!) they are sized to be printed onto standard U.S. paper size.  You may use my pattern for personal use only, please ask before making items to sell with my pattern, it may be available for commercial sale.  This would work well on t shirts, stuffed animals, hats, anything!
Mustached Pig Pieces
Red Bird Pieces

Cut out your hat pattern pieces, one in red and one in green.  I use fleece because it does not fray and it keeps you very warm during the winter months.

Cut out the pattern pieces

sew small pieces that go on larger pieces with a close zig zag stitch.   Use Black thread for the pieces to help make them look more cartoon-like and emphasize the features.

Sew together the pig ear pieces and the red bird feather together, right sides together.  Trim pieces and turn right side out.

Pin pieces onto hat pattern

Sew On with a tight zig zag stitch that will add a black border around the pieces

Place the pig pattern pieces

Sew pieces on
pin and stitch hat pieces together
Pin the red feather to the top of the hat and pin the top seam closed.

There you have one half of your hat.  Do the same for the pig side.

Put the faces together, right sides together.


Match back seams and pin all around the bottom of the hats.

When sewing the pieces together, I like to do coordinating thread to the top and bottom of the hat.

Turn right side out, pin the opening closed and stitch shut.

Open the hat and up and shape.

If you want to have the black around the pieces more exaggerated, cut pieces slightly larger out of black and put them under the pieces and stitch on.

Cute!


Wednesday, February 20, 2013

Baby Taggie - Redesigned

I have a baby shower I am going to that is coming up.  As usual, I want to make the gifts to give for the new baby.  The baby invite was a pink giraffe with pink zebra print.  I decided to make a taggie blanket in a giraffe shape with pink and minky fabric for the new baby girl.


For this project, I used white minky fabric - which I find to be a pain at times because it pulls and slips so easily, and pink fleece - just because it stuck out to me in my stash.

Your taggie blanket can be any size, or course, but mine is about 8 inches tall.  I wanted a small blanket to be able to easily take on the go.  You can add eyes or an amount of details to really personalize this project.

What you need first for this project is a shape for your blanket.  I traced the small giraffe from this pattern:
McCalls M6136 Retro Lamb, Horse and Giraffe In 2 Sizes

Here is my simple giraffe shape.  I find that using the minky material you need a simple shape.  Too complex and it becomes difficult to work with.

Pink your shape to your minky fabric (if you are using minky)

Since the legs are so close together, I just cut a slit between them, not keeping to the curve.

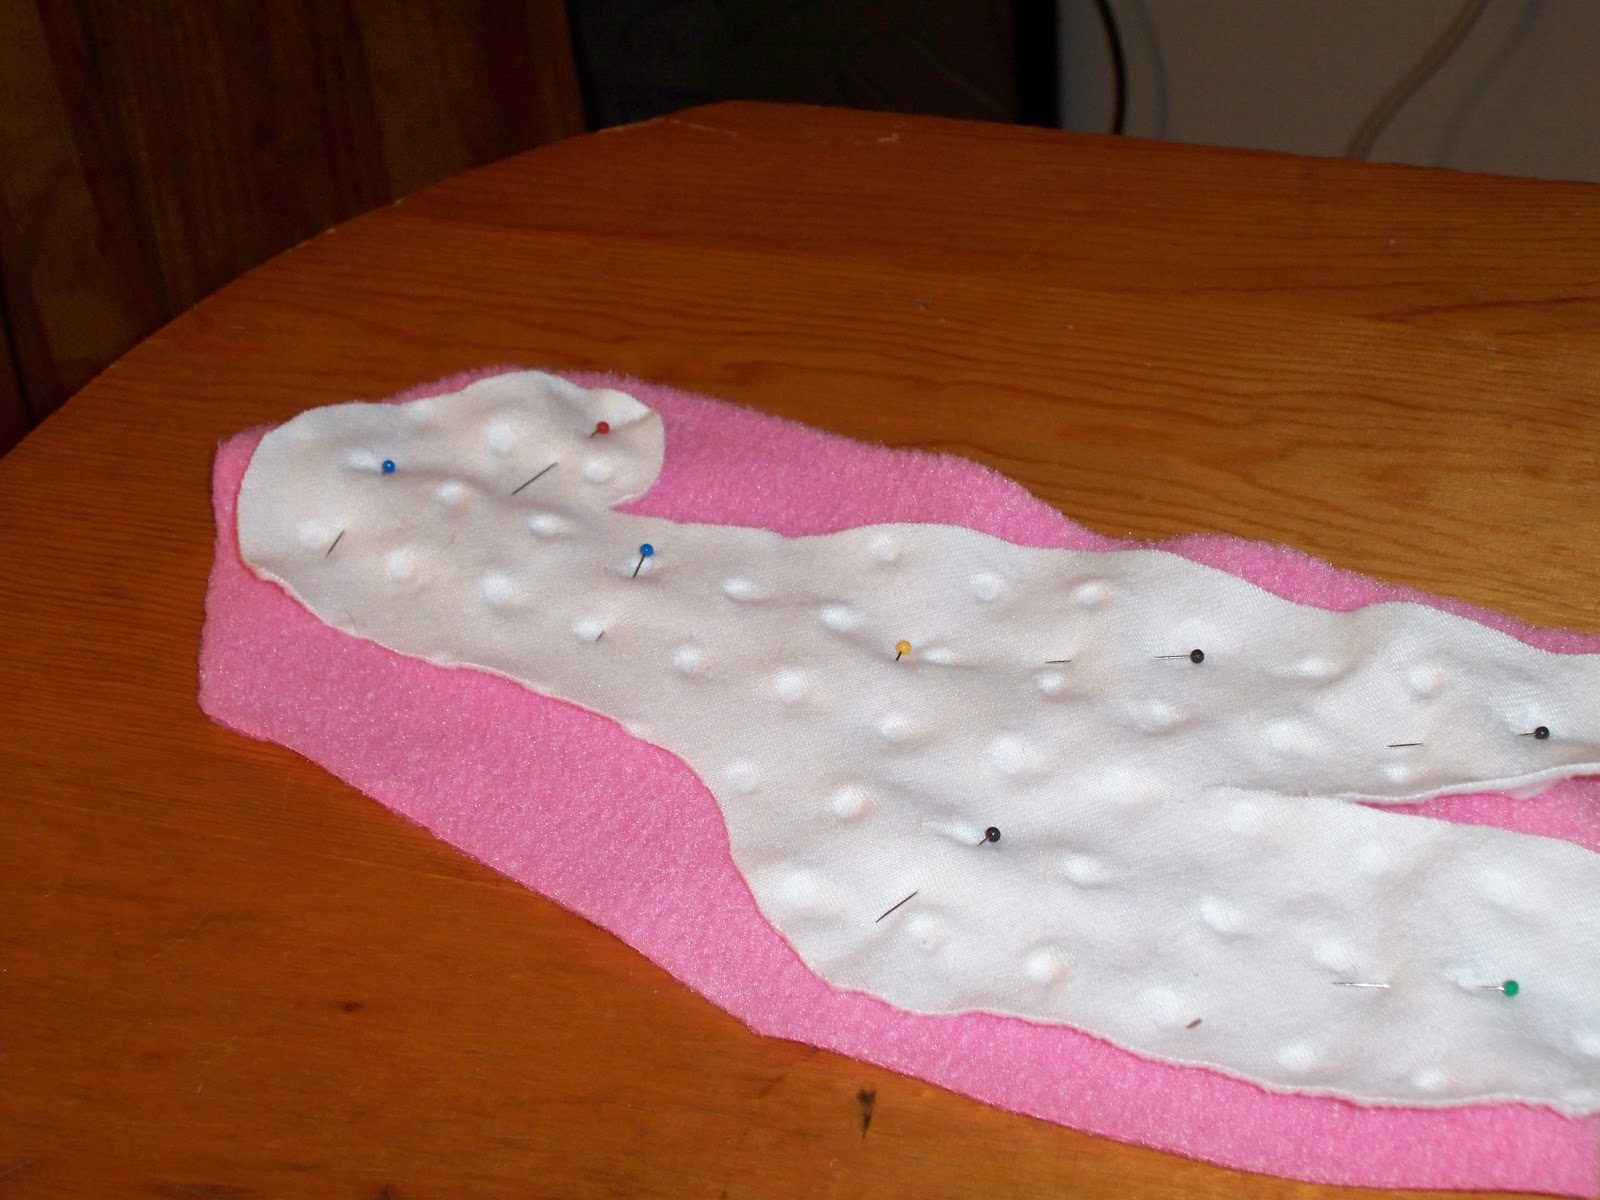
Next, put your minky and your other fabric right sides together and pin.  I actually do not cut out the other material when working with minky - just the slight suggestion of the shape.  I do this because the minky fabric tends to pull and this helps eliminate gaps in the fabric or the extra tension.

Cut your ribbons for the "taggie" part of the blanket.  For this design, I am adding the ribbons along where the giraffe's mane would be, giving it more of a functional design element instead of just adding ribbon along where ever. 

Pin your ribbons in between the fabric.  Here I would like to point out that I did it incorrectly in this picture.  I always have a hard time remembering to not put the ribbons right side together.  This will have your ribbon be wrong side out.  Your ribbon should be right sides out, towards the fabric.  I had to rip out this seam and sew it again for this project.

Sew around the shape with the minky fabric on top.  I sew with the minky on top because I can control the sliding and shifting easier from this angle.

Sew all the way around - don't forget to leave an opening to turn the fabric!

Cut around the seams.

Don't forget to clip around the corners for a more professional look.

Turn right side out and pin the opening closed.  You could stop after stitching up the opening, but I like to add some more dimension by top stitching around.

I put a pink thread in the bobbin and a white thread through the top to have two different colors while sewing.  I did this because I do want to give dimension with the top stitching, but I also want the thread to blend in. 

Top stitch around, again keeping the minky fabric on top.
The completed project.  I cute, original  comfort toy for a baby.  This project is easy and fairly quick - I made this one in only half an hour.

Here is the giraffe from the other side.